Well, the time has come, I am going to introduce You to my very first tutorial, with pictures and description and a PDF and everything 🙂 So hold on to your keyboards, here we go:
Our story started, well, mainly when I got my kids, and they started in daycare. Winters are harsh in Denmark, and those little heads and ears need very good protection against the cold wind. Talking about children, it is a very good idea to have a winter hat, that covers their ears and somehow their throat should be covered too, and it is essential, that the small ones cannot take their hats off easily. However, in Danish daycares they have this rule, that no clothing should have any strings on, even scarves are forbidden, due to strangling hazard. Understandable. That is why every Danish kid wears these very practical, warm winter hats, that they call “elephant hats”. They cover everything that needs to be covered, and the small ones can definitely not get out of it alone.
We also have quite a collection of elephant hats in our home, obviously, most of them are leftovers from last winter, aka too small for my kids. For some reason, I have a couple of hats that fit my son perfectly, but there was only one of these elephant hats in my daughter’s size. And this one and only girly elephant hat simply disappeared mysteriously, I have the suspicion, that my husband, who tends to loose everything he gets his hands on, has something to do with this…
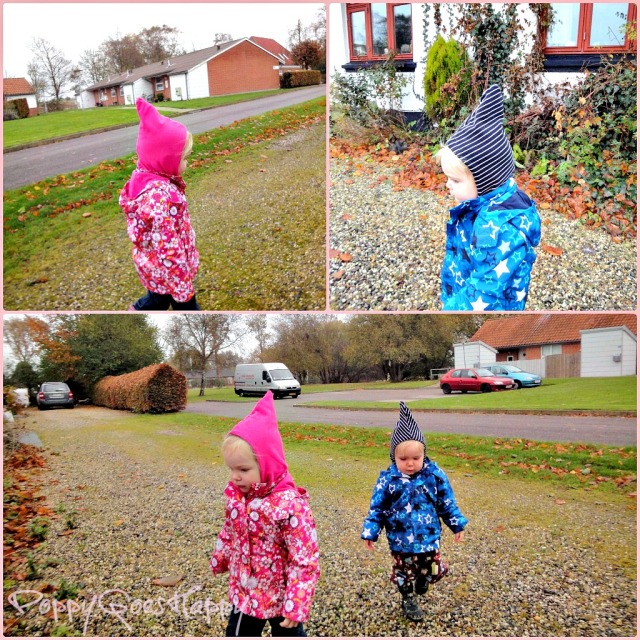
So here we were, winter came in suddenly, and yet, no elephant hat for my babygirl’s pretty little head. And since Wednesday is the big day of the week, when her preschool group goes on a trip, I needed a warm elephant hat very quickly. You can guess what happened, I decided to make one myself 🙂 I took some leftover isoli fabric (which is nice and warm and fluffy) for lining, and some stretch jersey, and created this very warm, funny looking hat. I got so excited, that I made one for my son as well 🙂
Here they are, my little elves, in their new and super-warm hats, on their way to the car:
But naturally one hat is not enough to go through a whole winter, especially in the case of kids. They just somehow get dirty and wet every time… So today I went on, and made another hat (I’m rolling :)) for Cherry, this time a little bit more girly one. And since I felt so amazing, I decided to create a little tutorial as well 🙂
First, if you, like me, haven’t slept for two days, thanks to a certain little boy who is growing his teeth and hence screaming all night, you need to start the process with a nice cup of coffee. And if you, like me, happened to start your day by cleaning up in the hallway after a pup with very healthy digestion, you might wanna pour a little bit of Baileys in that coffee too…
Feel better already, eh? 🙂 Now, look out of your window, embrace the sunshine, and if you can stare in the light without blinking, then you are ready to start sewing. If you feel the sudden urge to sing “Twinkle-twinkle little star”, then you miiight have poured a little bit too much Baileys in your coffee. In that case I recommend you not to go anywhere near your scissors or a sewing machine, you might wanna take a nap instead.
Now, lets assume we didn’t get drunk so early in the morning, as it would be disgraceful, and we are ready to work.
For this hat, you can use any kind of material, as long as it is stretchy. Jersey, velour jersey or isoli. I chose two layers of simple cotton jersey. To begin with, I cut out the pieces, 2 times for every layer, and then sew them together, interlocking (in my case zig-zagging, as my machine doesn’t have other functions) any raw edges, as I went.
I decided to make this hat a little bit more girly and elegant, so I made a felt flower of the same colour as the lining of the hat. I stumbled upon this tutorial on Pinterest, of foodwineandmodpodge. I think this flower is very cute, and very easy to make 🙂 Now, that the two layers were basically done, I took the hat I wanted to be on the outside, turned it rightside out, and stitched the flower to its place. Oh, so cute 🙂
After this I began to sew the two layers together. To do so, I turned them again inside out, put them into each other, so the right sides were facing each other, and sewed them together along the face cut. After I was done with this, I turned the hat back again, rightside out. Yeah, there is a lot of turning during the process…
Now, I did something I learnt from my Mum. She says, that everything with a lining in it, needs some extra securing, so the layers don’t go sliding all over the place. So I reached up in the hat, grabbed it at its back, and found a spot, where I can stitch the lining to the outer part, so it remains in its place. Obviously I had to turn this part inside out again…
Our hat is almost done, happy? 🙂
The final step, aka finishing the hat by closing it in the bottom, caused a bit of a trouble for me. The original description I found about lined hats was talking about leaving a folding hole open in the lining, sewing through it, then turning everything out and closing the hole. Well, my friends, I tried and tried and tried. But simply couldn’t figure it out, how this folding hole thingy can work. I stayed up really late last night, ended up staring at hats with no opening whatsoever, trying to solve this logical game, but failed. (Remember, I haven’t really slept much recently). So I decided to do it my way.
I took the interlocked (or zig-zagged) bottoms of the two layers, created a fold of about 1 cm on each, turned them against each other, then pinned and pressed them, and sewed them from the outside. Probably it is not the most elegant and professional solution, but this is the best I could come up with 🙂 Please, take a look at the pictures, if my description is confusing 🙂
Anyway, if you are still with me, and haven’t stopped reading after the first inside-out turning of layers, then you might be interested in the pattern for this hat.
I, with not little difficulties, created a PDF pattern, belive it or not 🙂 I am very proud of myself, however, the quality is quite poor, please excuse me for this, this is my very first PDF pattern. I still hope, it is usable.
So far there are only two sizes, one for 3-4 years and 1-2 years. The PDF should be printed out in A3 format, and don’t forget to add an extra cm (or inch) before cutting!
Well, enjoy 🙂 I am exhausted now from all this work, I’ll be off 🙂


