Risalamande

Monday was St. Martin’s day. Another holiday that people usually don’t remember the origins of, but are still looking forward to it, because it means some special, big eating, right… ๐Ÿ™‚

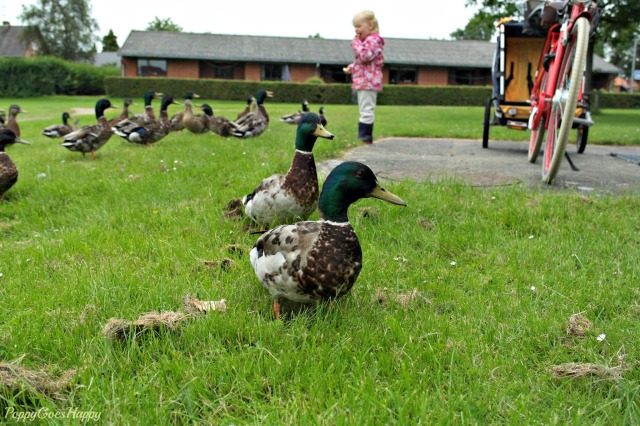
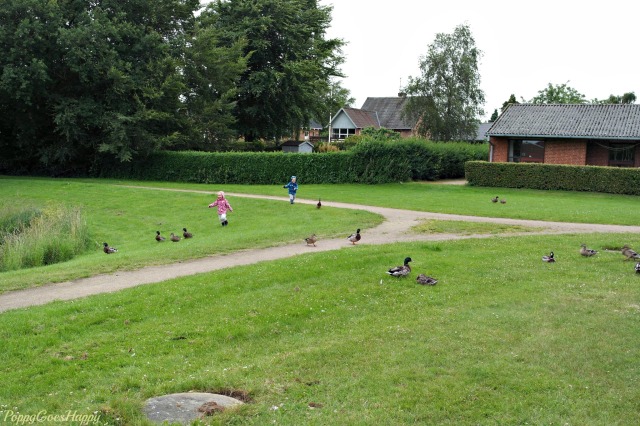
In Hungary it means eating goose, but in Denmark it is duck. Since roasted duck is also very usual as a Christmas dish, with potatoes, caramel-potatoes, red cabbage and gravy, it is not unusal for Danes, to celebrate Sankt Mortens Dag (as they call it) with an early Christmas feast. As it happens, that is what we exactly did this year ๐Ÿ™‚

I made the complete Danish Christmas menu, and to make it whole, I also prepared the special dessert that goes with it: Risalamande.

Risalamande with cherry sauce

Risalamande is basically chilled rice-porridge, blanded with chopped almonds, vanilla and whipped cream, served with sweet Cherry sauce. Usually on Christmas evening the hostess hides a whole almond piece in the middle of the pudding, she asks a few other people to stir it well, so there could be no cheating (at least that’s what my mother-in-law does), and then she serves it to the family. The one who finds the whole almond in his/her dish, is the winner of a special almond gift ๐Ÿ™‚ It’s a little bit like the coin in the British Christmas-pudding, I guess.

Making Risalamande is not very difficult, however it takes its time, especially because of all the cooling.

Here is how it goes:

Risalamande:

  • 3dl water
  • 2,5 dl porridge rice (small and round)
  • 1 liter milk
  • 100 g chopped almonds
  • 2 vanilla sticks
  • 4 sp sugar
  • 2,5 dl cream for whipping
  • cherry sauce or other berry sauce for serving

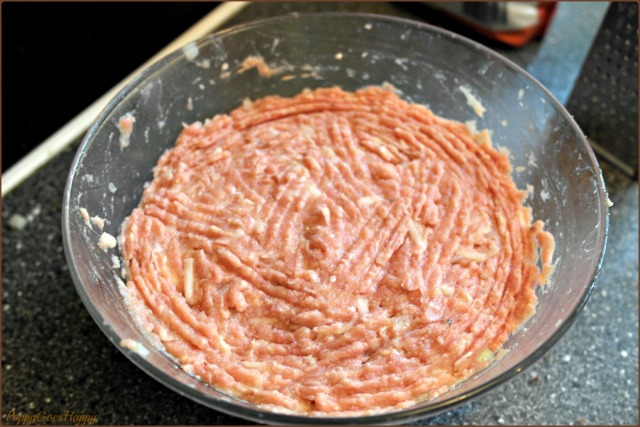
First you will make rice-porridge: Take a heavy-based saucepan, put water and rice in it and boil them together. Once it is boiling, cook it for an additional 2 mts while stirring it constantly. Add the milk and cook it at a low temperature, still stirring, for another 10 mts. Cover it and cook for half an hour more, stir it once in a while. Once it is done, let it cool in the fridge. It is best, if it can rest for a whole day.

preparing risalamande

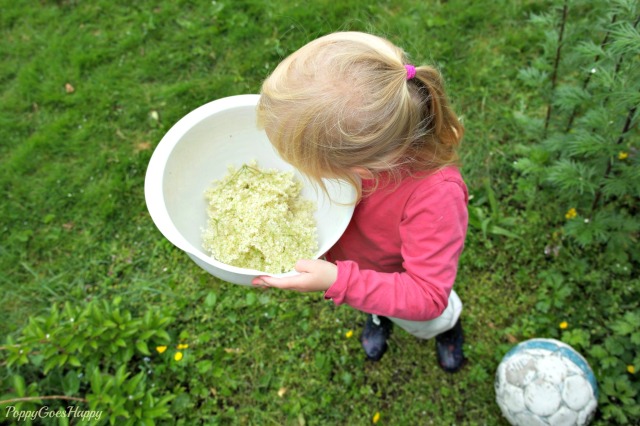
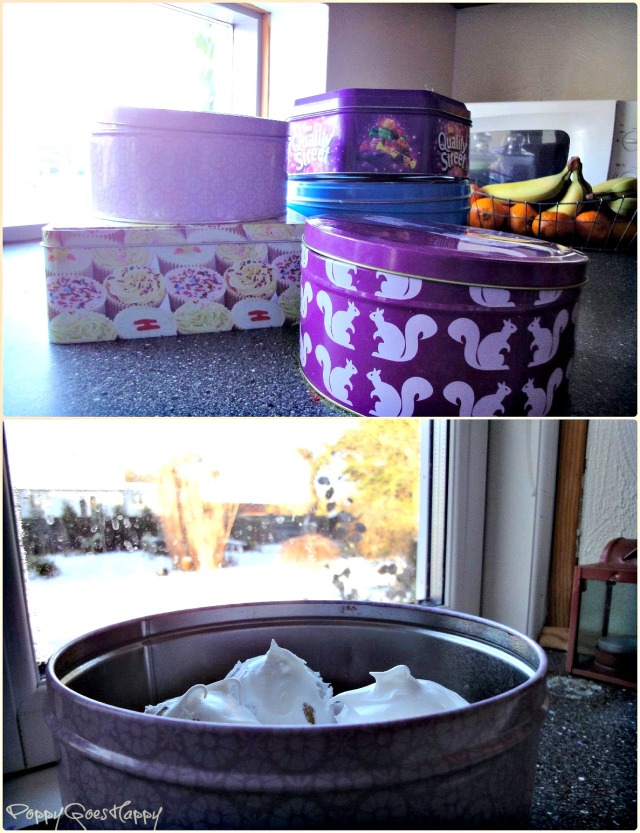
Bland the cold porridge, the vanilla seeds of the two sticks, sugar and the chopped almonds together. Whip the cream until you get a light foam, and then carefully fold it into the porridge. Set the risalamande in the fridge for another 2 hours before serving.

For serving take some lovely cherry or berry sauce. In Denmark you can buy hundreds of different types of little cartons of cherry sauce from November until January, in any shop.

Enjoy ๐Ÿ™‚

SAMSUNG CSC


Danish Meatballs with a Twist

Today my blog is one year old, hurra, hurra, hurra, as Danes would sing it. So I came with a Danish recipe for the joy of all my dear readers ๐Ÿ™‚

When it comes to meatballs, every nation has its own favourite. For example, in Hungary we love them made of pork, with lots of garlic and onions and paprika in them. Perfect finger food for a rainy autumn weekend, when the whole family on my Dad’s side is gathered to harvest the grapes on my great-uncles yard and start the process of making wine… but actually this is another story…

Now let’s talk about Danish meatballs. They call them Frikadeller, and they adore them ๐Ÿ™‚ My husband is no exception. Frikadeller are made of half pork, half calf meat, and are eaten with boiled potatoes and brown sauce… yummy, I have to say ๐Ÿ™‚ Of course when we first moved together, it was one of those dishes I had to learn to make, in order to become the perfect partner for life for a certain Danish boy with green eyes. Luckily I have my mother-in-law, who is an amazing cook, and she very kindly helped me learning to cook the Danish way.

Now let’s talk about minced meat in general. As a mother of two, and a loving wife of a guy who, if he could, would only eat meat, gravy, chips and candy, I need to find the tricky ways to make healthy food, without them noticing it. To be honest, I am quite lucky with my kids, because they like to eat fruits and vegetables, but their father is a suspicious man, and believes, that healthy food is tasteless food. I am on a mission to prove him wrong. And minced meat is my magic weapon! You see, you can hide a hell lot of things in minced meat! Take lasagne or pasta sauce for example. Onion, minced beef, tomatoes, plus I take a few carrotts, turnips, whatever, and grate them into the sauce. In a few meatballs or a meat loaf you can hide grated vegetables and fruits, and your family is eating one after the other, with a pleased smile on their greedy little faces, and they will never find out that they just got a portion of their recommended six-per-day. Hahaha (this is my evil motherly laugh)!

So when I make the Danish style meatballs, I usually grate some apples into them, and they are very nice with some berries like cranberry or blueberry popping up here and there. I made the blueberry version a few days ago, and to be even more healthy, instead of boiled potatoes and brown sauce I chose roasted autumn veggies with parmesan on top, and hummus. No complaints about that from my husband, who just got home from football practice, hungry ๐Ÿ™‚ Originally I wanted to put aside a few meatballs, and pack them for my kids’s lunch box the next day – because they are perfect for this purpose – but somehow there was nothing left…

Danish Meatballs With a Twist

Here is the basic recipe for Frikadeller. This amount gives you about 20 pieces:

  • 0.5 kg minced meat (pork and calf mixed)
  • 1 onion
  • 2-3 sp flour
  • 2-3 sp breadcrumbs
  • 1 dl milk
  • 1 egg
  • salt and pepper
  • vegetable oil and butter for frying

Optional:

  • grated apple of your choice
  • a handful of cranberries
  • a handful of blueberries

For making the mixture, you have to dice the onion, and mix it with all the other ingredients (except for the oil and butter). It is best for the mixture to sit in the fridge for about an hour before frying.

the mixture

For frying, melt and heat up the oil and the butter together in a large pan. With the help of two spoons, form the meatballs from the mixture. If they get sticky, dip the spoons in cold water, that helps. Fry the meatballs for a few minutes on one side, and when they are golden brown, turn them around, and fry for an additional few minutes.

fry them

And done. Easy-peasy ๐Ÿ™‚

Enjoy them fresh and warm, or cold in your lunch pack.

Elderflower Drink

What a hectic week! With my husband visiting Coppenhagen due to his work, and both of our kids falling victim to the nasty virus circulating in their daycare, I had my hands full.

Luckily the children didn’t get very sick. Sick enough to stay at home, but well enough to run around like poisoned mice… ๐Ÿ™‚ So yesterday I took out the bike and attached the kid-carrier behind it: I took Cherry and Paddington down to the nearest town, Hammel, to feed the ducks at the lake. They loved it!

SAMSUNG CSC

About the ducks: they are like the tame animals in a petting zoo: they are so used to people coming and feeding them all the time, that they are not scared at all of humans. Moreover, I haven’t even parked the bike, they were already all running towards us, quacking wildly, demanding their lunch… It also means that I could easily take close-up photos of them ๐Ÿ™‚

SAMSUNG CSC

Cherry found it amusing from the very first moment, but Paddington didn’t share her enthusiasm at first. Basically he was freaking out because of the pushy behaviour of the ducks ๐Ÿ™‚ Luckily later on he also started to appreciate the situation, and the bread I took with me was gone ย quite soon.

SAMSUNG CSC

After the bread was all eaten up, the kids engaged themselves in the classic game of chasing the ducks around – in the rain, of course, it is Denmark, after all ๐Ÿ™‚ Cherry couldn’t stop laughing at the funny knock-kneed way of running of the ducks. Later the kids collected some feathers, and we went home.

SAMSUNG CSC


And it was time to make some lovely elderflower drink ๐Ÿ™‚ย 

As far as I am concerned, I simply love the elderflower syrup drinks! So I was very happy to see, that we have some nice elderflower bushes in our garden, and right now it is high time to pluck them and turn them into some sweet, smooth, golden, summery syrup drinks…

bush

To make the drink, you are going to need the following:

  • An elderflower bush would be nice to have around, probably in the forest…
  • A big bowl or basket to collect the flowers
  • A pair of scissors
  • A bowl for cooking the syrup
  • Some clean bottles
  • A 4-year-old girl and a 2-year-old boy (optional, or can be replaced with children of any number, gender and age)

While I was trying my best to collect the flowers from the bush, Cherry was standing by, holding the bowl, and a little bit complaning about the bowl being heavy… ๐Ÿ™‚ Paddington was playing with the dog. Now that is what I call an ideal distribution of work tasks ๐Ÿ™‚

When collecting the flowers and putting them into the bowl, Cherry suddenly cried out: “Look, Mummy, the flowers all full of animals!!!” – well, it’s true. When it comes to “bio” elderflowers – and by that I mean that they are from our own garden, without the use of any chemicals – insects will decide to live and prosper among the bushes.

picking elderflower

That is why you have to give the flowers a very proper wash before using them. I flooded the flowers with plenty of water, thereafter I removed the floating corpses of the “animals” from the water. Not my favourite part of the process, I can tell you that…

washing

To make the syrup, you will going to need:

  • 40-50 bunches of elderflower
  • 1 kg sugar
  • 2 tbsp honey
  • 3 lemons
  • 2 l water

ingredients mix

You start with adding the sugar and the honey to a bowl af water, and make them boil. When it is boiling, you add the flowers and the sliced lemons, and stir the syrup.

elderflower syrup

After that just put the bowl to a cool place to chill, and let it stand there for 3-4 days. I covered the bowl with an insect net, to keep additional ingredients (dead bugs) away from the syrup. And the net might also keep away curious children of the syrup, though I cannot guarantee that… But our house already smells heavenly!!!

cooling

You will have to stir the syrup a few times daily. After a few days the syrup will be ready to be drained and put into clean bottles. You serve the drink by adding water to it.

So far I haven’t reached the point of draining and serving the drinks, but obviously I will keep you updated ๐Ÿ™‚

A Snowy Easter and the Perfect Milk Loaf

I have been absent for a while from my little blog. I had a good reason: My parents were visiting us for the Holidays, and since I see them so rarely, I’d rather spend the time with them than with my computer when I have the chance ๐Ÿ™‚

I picked them up at the happiest place on Earth ย about two weeks ago, and I dropped them off at the saddest place on Earth this Sunday: the same airport. I am turning 31 this year, but after I saw my Mummy and my Daddy off at the security check, I went to the lady’s room, locked myself in a cubicle, and simply cried my heart out. Once I felt fit enough I washed my face and went to the car and drove home, knowing that I am not going to see them for 3 months…

However we had a wonderful time while they were here, even though the weather was far from Spring. Like everywhere else in Europe, poor Easter Bunny had to lay the eggs in the snow this year.

wintereaster

It didn’t stop us feel all eastery and decorate the whole house with eggs and flowers.

decoreggs

And Saturday we had the traditional Easter dinner, Hungarian style: ham, cooked eggs, and braided milk loaf ๐Ÿ™‚ A little bit of Denmark was also represented in the form of tiny chicken tartelets:)

eastertable

Milk loaf is the best yeast dough you can find, something between a bread and a cake, and it cannot be missing from our Easter table. Usually you can buy beautiful milk loafs in any Hungarian baker shop, but Danes don’t bake such a thing, so I had to turn to my cookbook and used the recipe of my great-granny to create some milk loaf for us.

Milk Loaf

My favourite thing in Easter Milk Loaf is the raisins popping up in it, but my husband cannot stand raisins in any kind of baked product, so I decided to make one of the loafs without raisins, and instead I put some cocoa powder in one of the braids. My kids simply loved the results, Cherry basically only ate milk loaf with honey for the two days while the loafs lasted.

I tought I will share the old family recipe with you, because milk loafs are a treat for a birthday breakfast, for Easter, for Christmas or just because ๐Ÿ™‚

Milk Loaf Recipe:

  • 1 kg flour
  • 40 g yeast
  • 4 eggyolks
  • 150 g margarine
  • 100 g sugar
  • 7 dl milk
  • 2 teaspoon salt

Put the flour in a big bowl. Take 4 dl of the milk, warm it up a little, stir in ย 2 tablespoon of the sugar and crumble the yeast in it. Cover the milk and the yeast will appear in the form of foam on the top within 8-10 mts. Now make a little hole in the middle of the flour with your hand, pour in the yeasty milk, stir in a little bit of the flour around the hole (this is called the sourdough), sprinkle some extra flour on top, cover the bowl, put it in a warm spot and leave the sourdough rise.

dough

Once it has risen a bit, warm up the rest of the milk and melt the margarine. ย Pour the milk on the soursough, add the rest of the sugar, the eggyolks, and finally stir in the melted margarine, bit by bit.

The dough should be shiny and airy. Sprinkle some flour on top again, cover the bowl and leave it to rise. It should rise up pretty high, about double as high as it was, within about half an hour.

Now sprinkle some flour on your worksurface, and pull the dough out of the bowl. It is sticky and thin, but don’t worry, that is the way it should be, just put some flour on your hands, and it makes it easier to work with the dough. Make 6 rolls out of it, and if you want to add something extra to the different braids (like raisins, dried fruit or cocoa powder), now is the time. Take one roll by its two ends and spin them into opposite directions. Repeat the same with all of the rolls.

braided

Now braid 3 rolls together, and the other 3 rolls together. Put them in greased bread forms, or you can put them next to each other in an ordinary cake form as well. ย Now cover them again and leave them to rise. Once they have risen close up to the edge of the form, grease them with some whipped egg and put them to the warm oven.

baked

Bake them on cca. 175 C for about 40-45 minutes. Enjoy ๐Ÿ™‚

raisins and cocoa

Girls day out at Ikea

Cherry woke up with a little fever today. No kindergarden for her. But she felt quite ok, so I decided to take her to Ikea. The main reason for the trip was to buy some new lamps for the guest room, but of course one cannot just go and buy one thing at Ikea, I am sure you all understand this ๐Ÿ™‚ My husband doesn’t ๐Ÿ™‚

Cherry and I ended up buying some new plants for the house as well. You have to know something about me: I kill plants… not intentionally, but I do kill them all eventually… It was very hard to accept that no matter how hard I try, how often I water or don’t water them, put them on direct light, semi-light, darkness, one by one they fade away ๐Ÿ˜ฆ Finally I had to realise, real plants in pots are not for me. So the plants we bought today are all artificial. Fake. Plastic. But actually very good quality, and you can hardly see they are not real.

plants in row

Cherry also picked some plastic flowers of different colours that we put in a vase and then in her room. She is very happy about them ๐Ÿ™‚

roses

We also bought some cookie cutters, cute animal figures, and tried them right away when we came home. I made some linzer dough, and Cherry helped me cutting the cookies. We got lots of squirrels, hedgehogs, foxes, snails, and also some cars, trains, planes, ships and what not. While we were working hard, Cherry ran upstairs a few times, went into her room, and smelled her fake flowers ๐Ÿ™‚ We also had a nice conversation like this: “Sweetie, don’t eat the raw dough, you’re gonna get sick!” – “But I am already sick!” You cannot beat children logic ๐Ÿ™‚

When the cookies were done, they got some chocolate icing, and decoration.

cookies

Cookies in Boxes, last volume for this year :)

Due to circumstances I had no power over (like my own bowel movements for a short period of time…), I did not manage to make as many cookies as I wanted to. Well, no problem because the missing ones can be still made next year ๐Ÿ™‚ But we did manage to make a portion of each Danish delicacies that are sooooo connected with Christmas.

The first one is called Pebbernรธdder, meaning “peppernuts”, and has absolutely nothing to do with either pepper or nuts, its just a nice, spicy ginger bread style cookie, which has a shape of a nut. The other one is not really a cookie, rather layered marzipan, but nonetheless very yummy.

Pebbernรธdder:

pebbernoedder

These cookies simply cannot be left out for a real Danish Christmas. If you don’t bake them, you buy them in big bags, and munch them during the wonderful month of December. My husband insisted on that we should make them ourselves this year, because it is so fun to bake with kids (and it is!). So I called my mother-in-law, and asked for her recipe. When it comes Danish recipes, she is the first one I turn to, not a cooking book ๐Ÿ™‚ Later she sent me this recipe:

  • 1 kg flour
  • 400 g margarine
  • 500 g sugar
  • 2 sp lightย syrup
  • 2 eggs
  • 2 dl milk
  • 3 tsp hartshorn salt
  • 2 tsp cinnamon
  • 2 tsp ground ginger
  • bit of ground lemon peel

pb dough

I only used half amount of everything, and still got plenty of cookies in the end. You just mix everything together, then roll thin cylinders out of the dough, and cut small pieces of it. Perfect job for little girls with at least 4-5 beaded necklaces on ๐Ÿ™‚

pb cutting

Lay them on a baking tray covered with baking paper, and bake them on 200 Celsius for about 20-25 mts, until they get nice and brown.

pb done

Once they are done, it is very important to perform a quality check on the cookies! Little boys are very suitable to do so ๐Ÿ™‚


Marzipan Slices:

marzipan slices

Or, my little brother’s favourite treats ๐Ÿ™‚ You can also buy them in any shop around Christmas, in many different qualities. But it is much more fun (and sometimes even more expensive…) to make your own ones ๐Ÿ™‚

You will need some raw marzipan, some nougat bar, and food colouring of your choice.

pure marzipan

I went with green and red marzipan, and of course the raw colour and nougat as well ๐Ÿ™‚ Now all we have to do, is to make thin slices of everything, then layer them nicely. I found cheese cutter to work best for slicing nougat, and a very sharp knife, to slice the cold (out of the fridge) marzipan.

layered marcipan

Once I layered them, I decided to put them back into the fridge again, before cutting them up, because it is much more easier to work with cold marzipan.

In the meantime, I made some figures out of the left-over marzipan: An elegant, pink, plumpy,ย Icelandicย type of pony for my daughter (yes, it is a pony, stop laughing!), and a coolย sport carย for my car-maniac son. If you, at this point, would like to form comments like “Geez, I understand why she is not a professional marzipan figure manufacturer”, then I have to tell you, that luckily my kids are very sophisticated, andย recognizeย art at once when they see it, and knew instantly what the two figures were ๐Ÿ™‚ However, Paddington refused to eat or even touch his marzipan car…

marzipan figures

Anyway, look at these divine marzipan slices…

divine slices

This year I decided to make small packages of Christmas goodies for family members as a gift, so I made a few scone shaped paper bags, and packed them with pebbernรธdder and the marzipan slices. I hope they will beย receivedย with joy ๐Ÿ™‚

wrapping the goodies


Cookies in Boxes Vol.2 – Linzer

Oh, the Linzer…

Linzer

Anyone, who has ever heard about the Austro-Hungarian Empire, is not gonna be surprised by the fact that Austria and Hungary share a lot of traditions and recipes. Especially when it comes to cakes, cookies, tortes, and all the heavenly results of the development of confectionery. One of these shared heavenly gems is the Linzer torte. It is very popular as a cake, but also as cookies, made according to the same recipe, and they cannot be absent from the Christmas dessert table. It is almost obvious that I also had to make them this year to fill up at least one of my empty cookie boxes…

I guess every family has their own recipe for it. So do we ๐Ÿ™‚ This recipe is old, very old, and my Mum always makes it for Christmas, following the sharp, decent handwriting of her grandmother. I copied this recipe to my own cookbook, and brought it to Denmark.

My Greatgranny is very special to me. I was named after her (she hated her given name all her life – until I was born and given the same name), and we were lucky enough to spend the first two years of my life together, in the same home. When my Mum went to university, she left home and moved in with my Greatgranny. It was not easy to get your own flat at the time my parents were young, so when my Mum and Dad got married, they simply lived together with Greatgranny and looked after each other. Unfortunately I don’t remember much of the time spent together with Greatgranny. But I have heard the stories all my life, and she must have been a great person! She lives through us, and her legendary cooking and baking.

That’s us, about 30 years ago ๐Ÿ™‚

greatgranny


And this is her recipe for Linzer:

  • 600 g flour
  • 300 g margarine
  • 150 g icing sugar
  • a pinch of salt
  • a pinch of baking soda
  • grated peel of half a lemon
  • 3 egg yolks
  • milk
  • jam of your choice

Making linzer dough is not rocket science, really ๐Ÿ™‚ You just put all the ingredients (except the jam) in a bowl, and work them togetherย thoroughly. You only need to add a little bit of milk, so you get a light dough. It really depends on the quality of the flour you use, but it is really only a little bit of milk. Less than a dl, I would say…

Because we are only 2 adults and 2 children, I only used 400 grams of flour and equivalent ingredients, but I heard that Greatgranny used to bake linzer of 1,2 kgs of flour for the whole family…

linzer dough


Once the dough is done, roll it out very thin with a rolling pin, and cut different shapes out of it. Perfect task for small baby hands ๐Ÿ™‚ Since later we are going to fill the cookies up with jam, it is important that you cut the same amount of full and holey shapes that will go together.

shapes


Preheat your oven to 200 Celsius, and bake the cookies for no longer than 10-12 minutes! They don’t need to get brown and too crispy, you want them nice and soft.

Once they are done and cold, take the jam of your choice (we traditionally use apricot jam, but any other will do as well), and whip it until it gets hard.

Now you can fill your cookies: Put aย spoonfulย of jam on the middle of the full cookies, then gently put a holey cookie on the top.

baking and filling


You can sprinkle them with some icing sugar, so they don’t just taste, but also look yummie ๐Ÿ™‚

yummie linzers


That’s it. Wasn’t too difficult, was it? Enjoy!


Cookies in Boxes Vol.1 – Honey Kisses

Hi, I’m Poppy, and I’m a box-alcoholic… I collect all kinds of boxes, I just cannot resist them, and after I have brought them home I try to justify their existence by putting random things in them, making them somewhat useful. It usually results in none of us finding anything. As my husband once said, after looking for his phone charger in vain: “You and your boxes…”

But there are a few boxes that everyone knows for sure what they hide. The lovely tin boxes, sitting on the top of the kitchen cupboard, waiting for me to make some cookies and fill them up. Even my 21 months old Paddington knows without doubt, and from time to time you find him standing in the kitchen, pointing up to the boxes, repeating one word of his (so far) not too wideย repertoireย  “mere, mere, mere!” (more, more, more!)

Well, Christmas is coming, and it is time to fill up my lonely, empty cookie boxes again. One by one ๐Ÿ™‚

boxes and cookies

We have a lot of different kinds of cookies on plan, since I long for the tastes of my childhood, the Hungarian Christmas cookies, and my husband longs for the tastes of his childhood, the Danish ones:) The kids luckily don’t have any preferences yet, they simply want to eat,ย preferablyย all the time, if possible. Any kind of cookie is welcome in their little, round bellies.

I decided to start the line by making one of the Hungarian cookies (I make them, I get to choose the order – aka: my kitchen my rules, hehe ๐Ÿ™‚ ). I was browsing the Internet the other day, and stumbled upon a lovely recipe of a kind of gingerbread, called Honey Kisses in Hungarian (or, if you prefer, Mรฉzespuszedli). It’s something I always loved very much, and because of the spices used for making it, it is very christmassy. Usually, for Christmas, I always bake according to old, family recipes, but my handwritten cookbook, that I once copied from the one my Mum owns (containing recipes from her Mum and Grandma as well) unfortunately doesn’t include a recipe for the honey kisses. So I decided to give a go to the recipe I had found. It is of a Hungarian gastro-blogger, TรผcsรถkBogรกr. And here it goes:

Honey Kisses:

Dough:

  • 330 g flour
  • 50 g brown sugar
  • 120 g honey (I prefer a liquid kind of honey for this recipe)
  • 2 eggs
  • 2 tbsp water
  • 3 tbsp veg. oil
  • 1 tsp baking soda
  • 1 tbsp gingerbread spice mix (If you, like me, cannot find the spice mix, you can substitute it with 1tsp cinnamon, 1tsp ground cardamom, and 1 tsp ground cloves)
  • a pinch of salt

Icing:

  • 2ย egg whites
  • 175 g icing sugar

First you take the brown sugar, the eggs (both whites and yolks), the honey, the water, the oil and the salt, and whip them very good. Then you add the mix of the flour, the baking soda and the spices to it, and work the whole thingย togetherย thoroughly. You get a soft dough. Now you put it in the fridge, for min. 1 hour. (My dough was chilling in the fridge for more than 2 hours, because it was such a beautiful sunshine, that we had to go for a walk with my husband and the dog).

preparing honey kisses

Preheat the oven to 175 Celsius. Take the dough, and form little, walnut sized balls of it (it is easy, if you water your handsย regularly,ย so the dough is not gonna stick on your fingers), and put them on a baking tray covered with baking sheet. ย Leave some space between the balls, as they are going to rise while baking. Once you formed the balls, take a tablespoon, water it, and gently press the top of ย the balls with it. Now bake them for 10-12 minutes.

baking honey kisses

Once the kisses are done, prepare the icing. Put the egg whites and the icing sugar in a bowl, and whip them very good, above steam (a pot of boiling water). Wait until the cookies get cold, then fold them into the icing. You can also choose to fold them in melted chocolate instead, and probably you want to hide a little bit of prune jam inside of the kisses as well… possibilities are countless ๐Ÿ™‚

icing honey kisses

Let them dry… If you can… This recipe gives you about 40 honey kisses, we only had about half of them left, by the time they got dry. I heard that they should last and stay nice and soft quite long in a box, but we will never experience it, the kisses are all gone by now… ๐Ÿ™‚

Enjoy ๐Ÿ™‚

Honey Kisses